

Printer Setup
The printer's IP address will be listed on the printer's display, labeled on the printer, or can be printed on a configuration page from the printer. Below are the printers available for public use in the IGB.
- Color Printers
-
Printer Name Location IP Address lj-color-109-lab.igb.illinois.edu 109 (Concourse) 128.174.125.234 lj-color-109.igb.illinois.edu 109 (Concourse) 128.174.124.227 lj-color-1n.igb.illinois.edu 1414 (1st Floor North) 128.174.127.145 lj-color-1s.igb.illinois.edu 1136 (1st Floor South) 128.174.127.91 lj-color-1116.igb.illinois.edu 1116 (1st Floor South) 128.174.126.138 lj-color-2n.igb.illinois.edu 2414 (2nd Floor North) 128.174.124.239 lj-color-2s.igb.illinois.edu 2136 (2nd Floor South) 128.174.124.242 lj-color-3n.igb.illinois.edu 3414 (3rd Floor North) 128.174.125.212 lj-color-3s.igb.illinois.edu 3136 (3rd Floor South) 128.174.124.241 lj-color-3116.igb.illinois.edu 3116 (3rd Floor South) 128.174.127.89 - Black & White Printers
-
Printer Name Location IP Address lj-black-1500.igb.illinois.edu 1500 (1st Floor North) 128.174.126.218 lj-black-1s.igb.illinois.edu 1116 (1st Floor South) 128.174.127.89 lj-black-2n-2.igb.illinois.edu 2414 (2nd Floor North) 128.174.125.181 lj-black-3n.igb.illinois.edu 3414 (3rd Floor North) 128.174.124.240 lj-black-3s.igb.illinois.edu 3136 (3rd Floor South) 128.174.125.210
Printer Installation and Removal
- macOS 14+
-
To add a printer
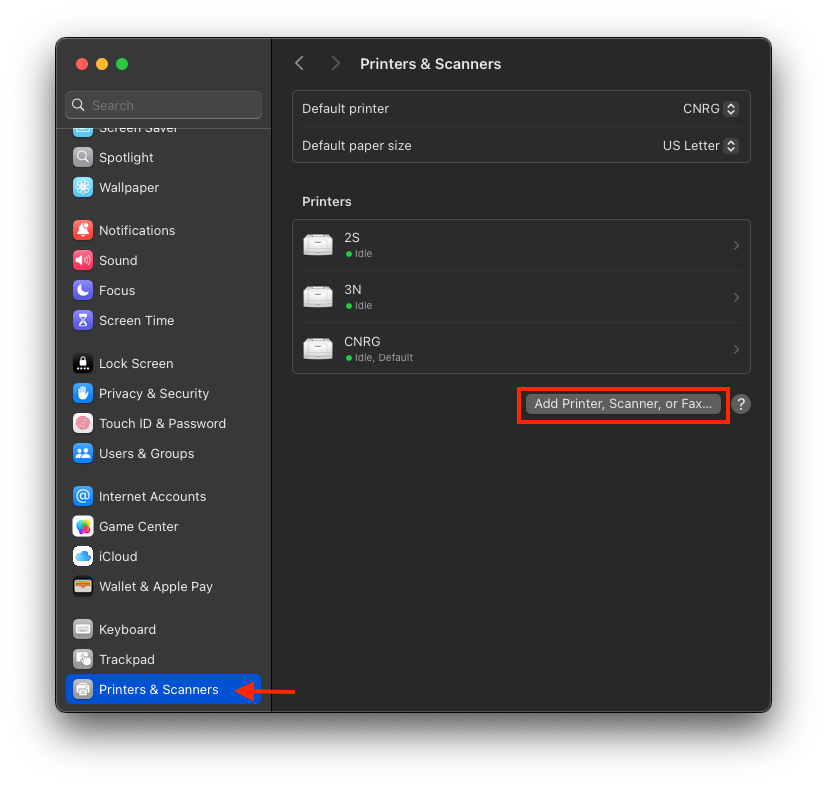
- Open System Settings and scroll down to "Printers & Scanners". Click on "Add Printer, Scanner, or Fax..."
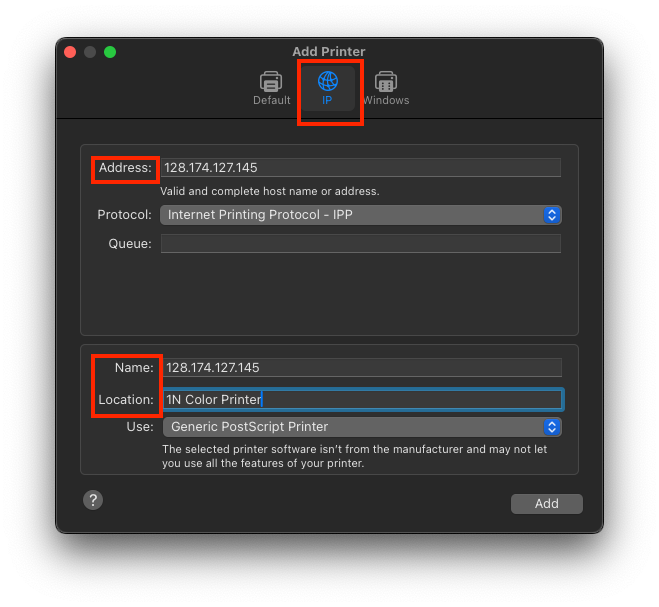
- Select the IP symbol at the top.
- Enter the printer's IP address in the Address field (128.174.XXX.XXX).
- Select "Internet Printing Protocol - IPP"
- Enter the name and location of the printer. This is how the printer will be labeled for your computer.
- Select the driver for your printer if specified. If the manufacturer and model is not available in the list, choose "Generic PostScript Printer".
- Click "Add"
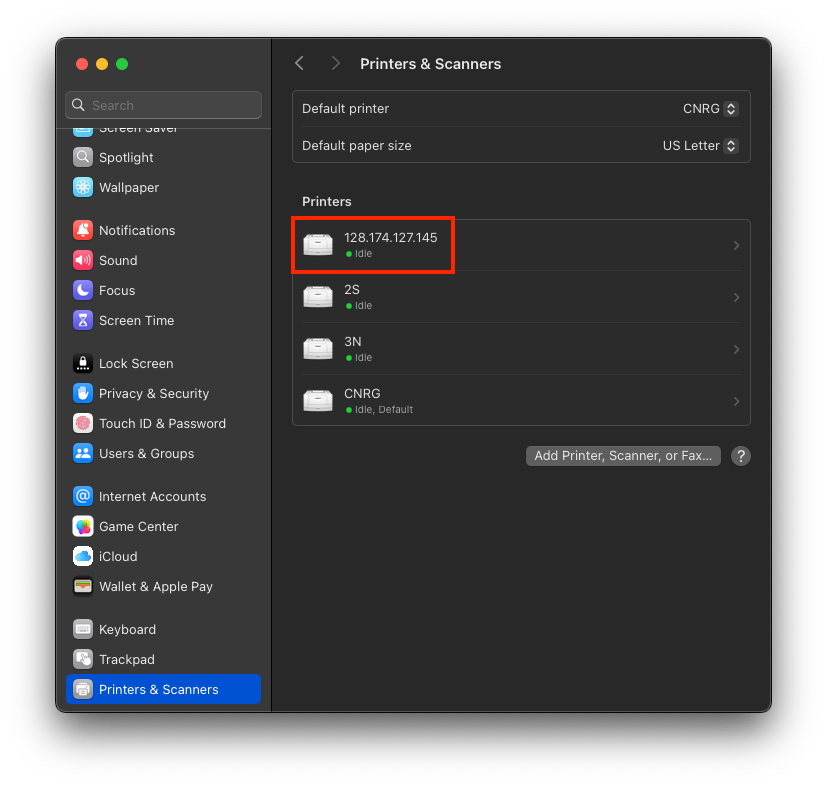
- Your new printer will now appear in the list of printers with the name you entered or the IP address if no name was specified.
To remove a printer
- Open System Settings and scroll down to "Printers & Scanners", then select the printer that you would like to remove.

- Click "Remove Printer..." and confirm that you want to remove the printer.

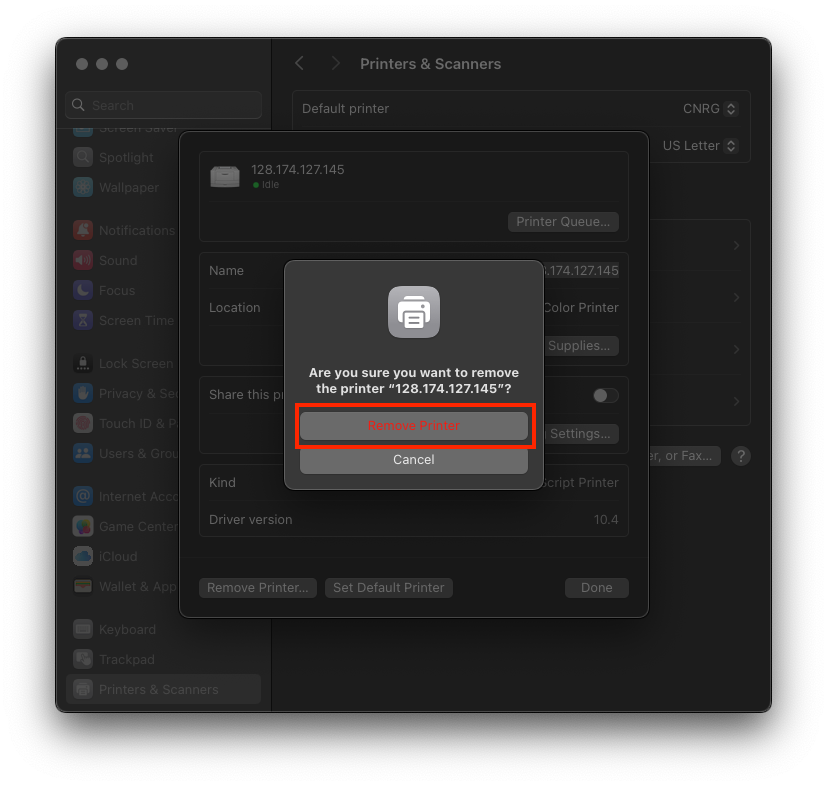
- The printer will now be removed from the list of known printers.
- Windows 11
-
To add a printer
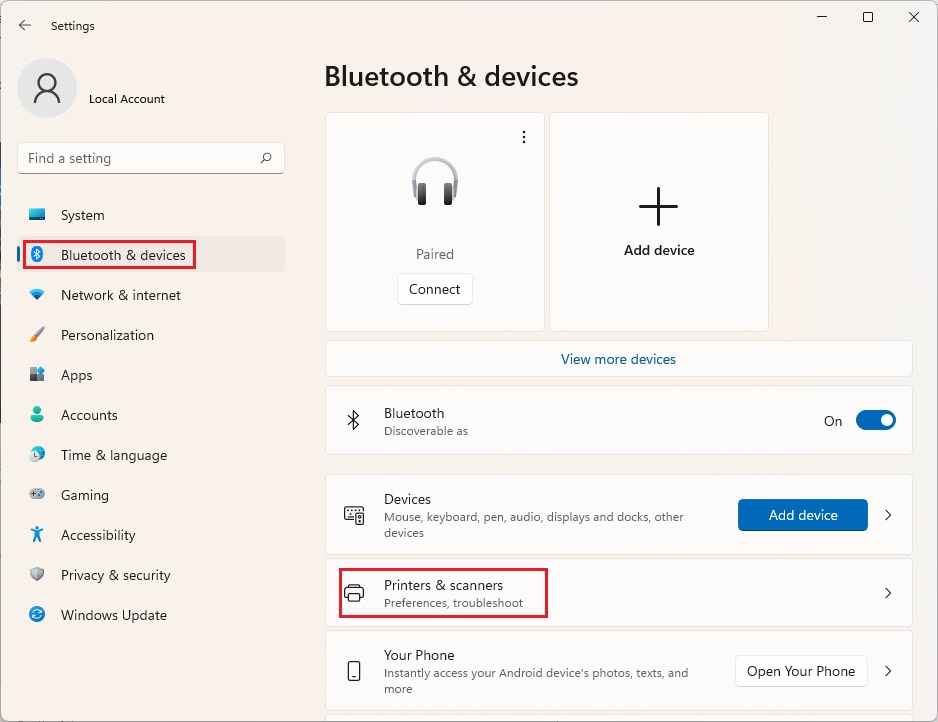
- Open the Settings window by going to Start -> Settings.
- Click "Bluetooth & devices" and then "Printers & scanners".
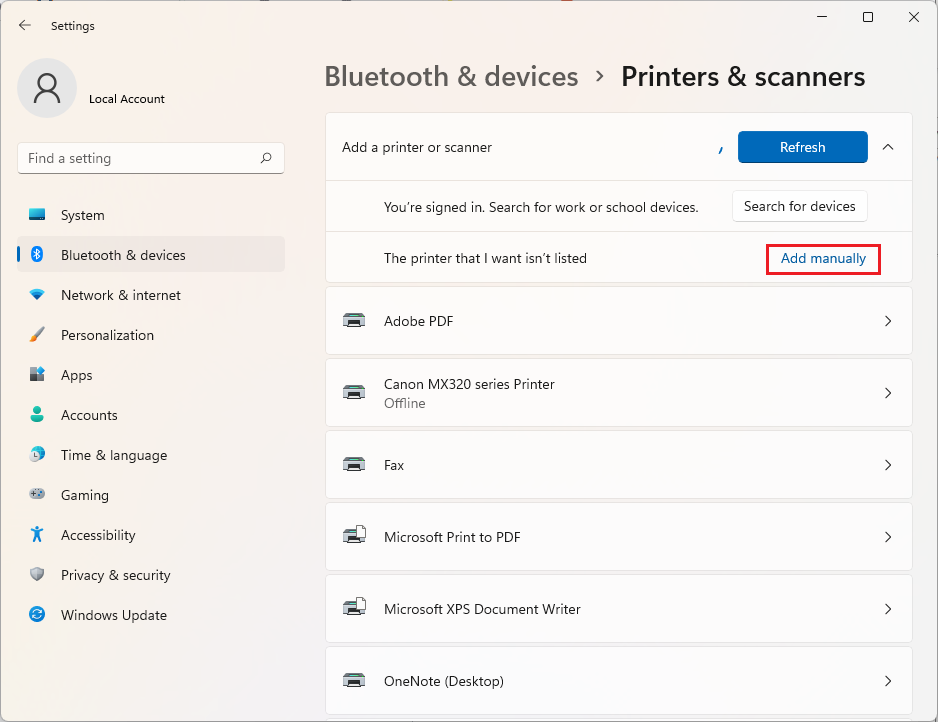
- Click "Add device" and then click "Add a new device manually" next to "The printer that I want isn't listed".
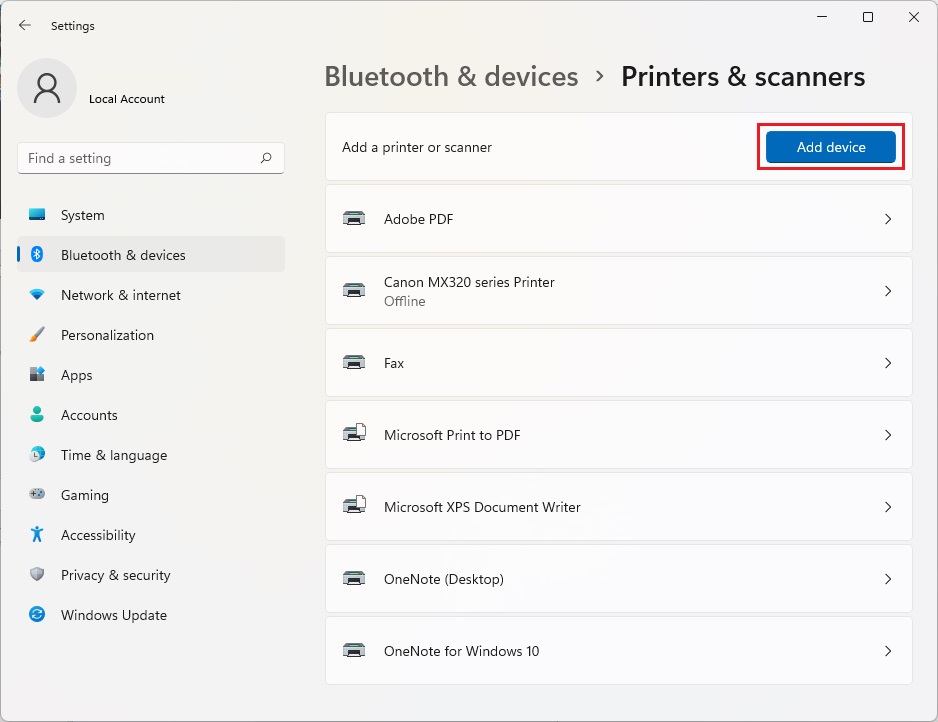
- You may need to scroll down after clicking "Add device" to see "Add a new device manually" appear.
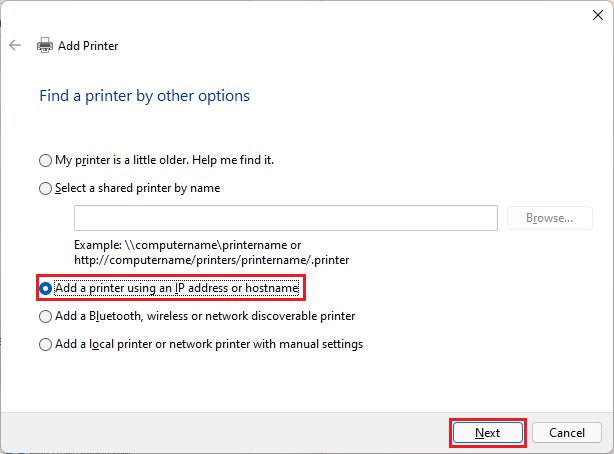
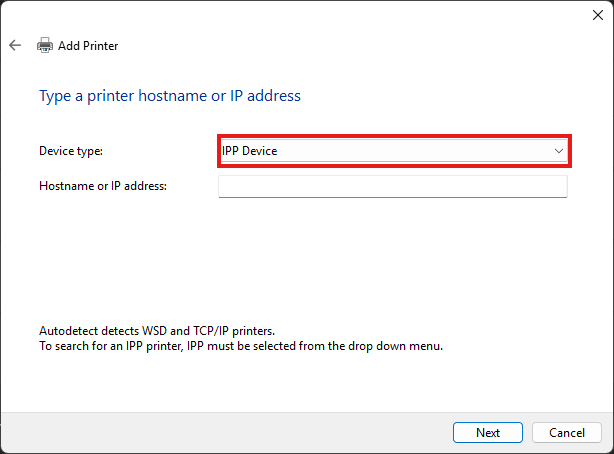
- Select "Add a printer using an IP or hostname," then click "Next".
- Choose "IPP Device" from the "Device type" dropdown menu, then enter the IP address of the printer and click "Next".
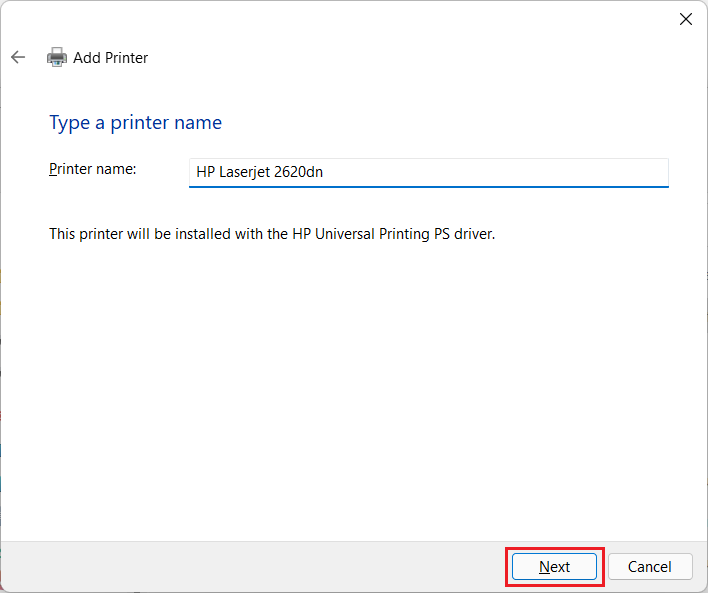
- You can then rename the printer and click "Next".
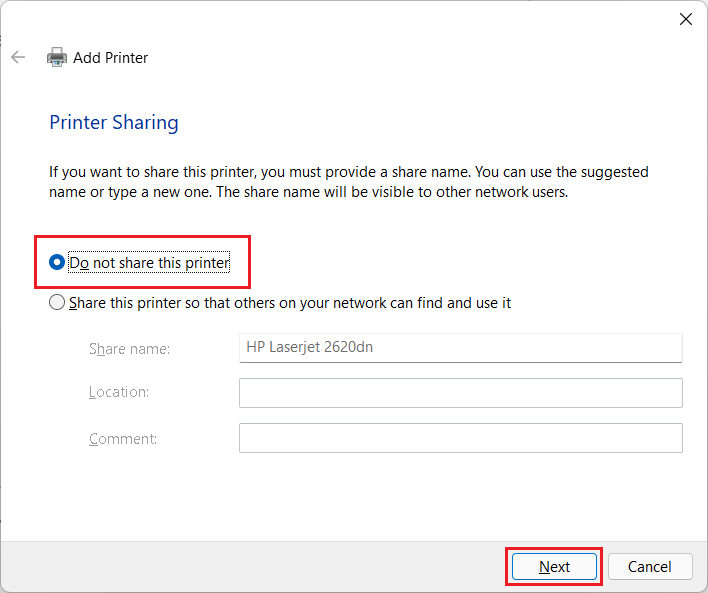
- Select "Do not share this printer," then click "Next".
- Click "Print a test page" to confirm that you are able to print from the printer. Once the test print comes out, click "Finish".
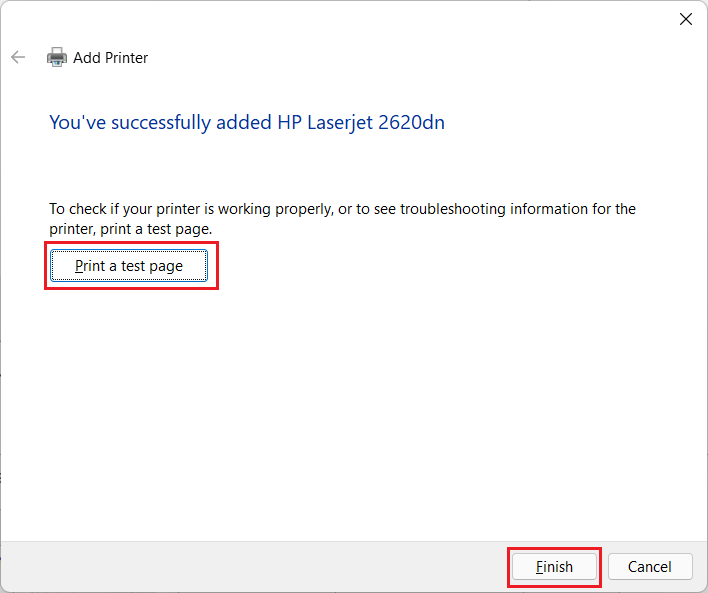
- You will now see the printer with the name you entered in the list of your printers & scanners.
To remove a printer
- Open the Settings window by going to Start > Settings.
- Click "Bluetooth & devices" and then "Printers & scanners".
- Select the printer that you would like to remove and click "Remove".
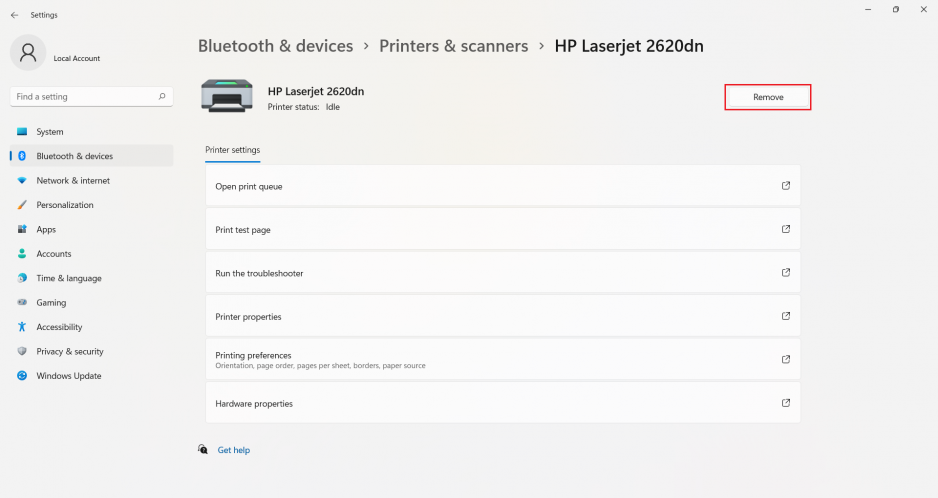
- The printer will now be removed from the list of known printers.
Network Scanning
Scanning via the HP LaserJet 700 is a free service provided by the IGB and can be found throughout the building next to the theme admins.
- Retrieve Scanned Files
-
Scanned documents are automatically saved to the dropbox folder located in your home folder on the IGB file server. Click here for instructions on how to access the IGB file server.
- Available Scanners
-
HP LaserJet 700: Anyone with an IGB account may sign into these printers and scan to their Dropbox folder on the IGB file server.
Click here for more detailed information and instructions for the HP LaserJet 700
- How to Scan on the HP LaserJet 700
-
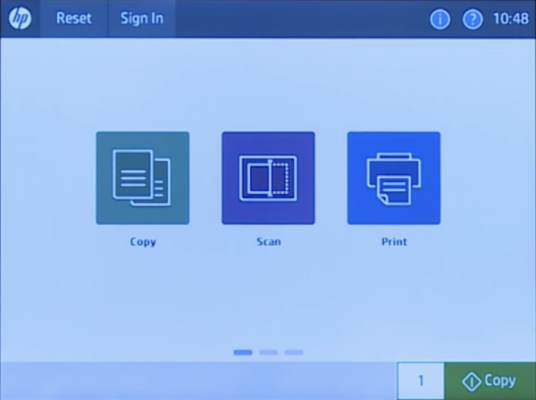
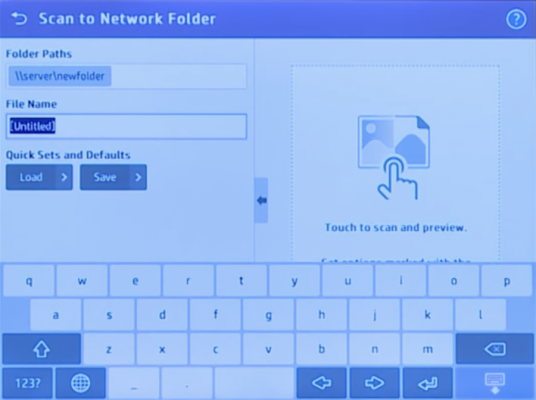
- Tap "Scan".
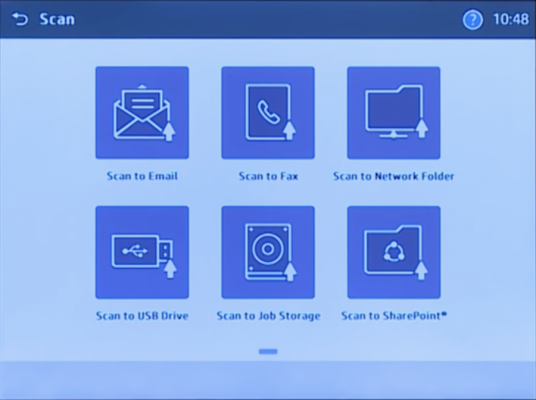
- Tap "Scan to Network Folder". You also have the option to scan to email or USB.
- Enter in the path to your personal folder, such as \\file-server.igb.illinois.edu\home\a-m\(user name)\dropbox.
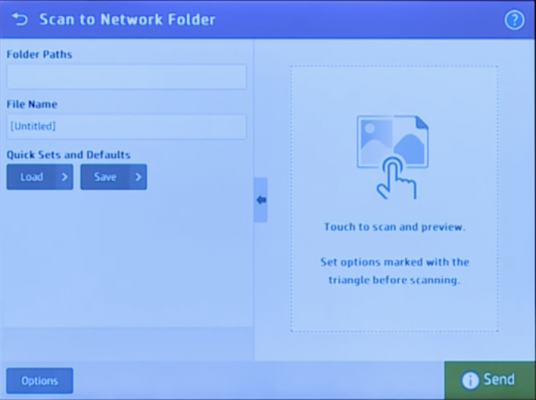
- Sign in using your IGB account (NetID and IGB password).

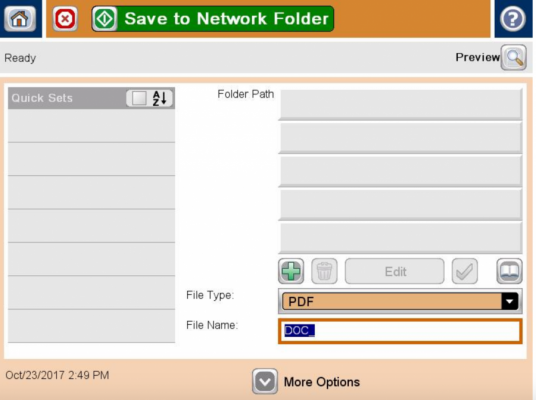
- Once you sign in, the screen below will appear.
- You can rename your file if you would like, then tap "Save" in the bottom right corner.
- Tap the preview and scan buttons to send. You can also change options such as File Type, Color or Black and White, Size, Duplex Scanning, etc.

- More Options on the HP LaserJet 700
-
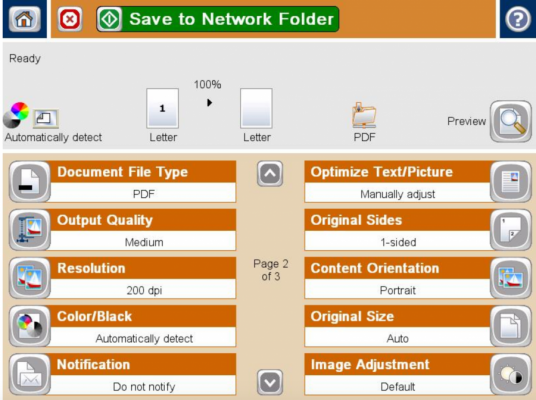
For more available Network scanning options on the LaserJet 700 (such as Color or Black and White, Single or Double sided copies, etc.), after choosing your NetID and "OK", tap "More Options" at the bottom of the following screen. You will then see the second screen shown here with ten different categories. After you finish selecting your options, tap "Save to Network Folder".
- Color or Black and White
-
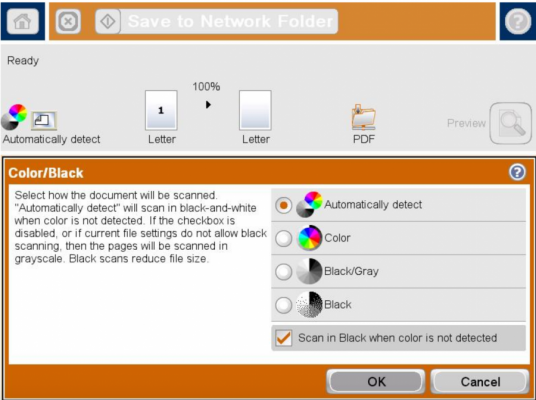
The following screen will allow you to change the coper from black and white to color. This setting should not need to be changed as it is set to automatic by default. If you would like a color document scanned in black and white only, use this setting.
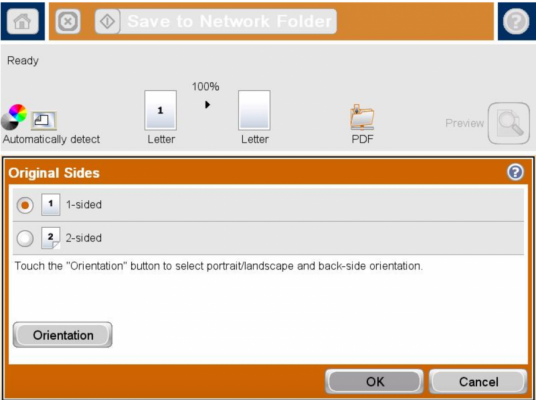
- Two-sided Duplex Scanning
-
If you have a two-sided document that you want to scan, use the following settings under "Original Sides" to change it to two-sided).
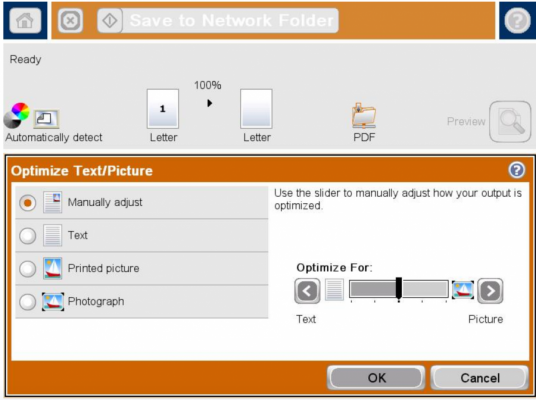
- Text/Picture Quality
-
You may want to change this setting under "Optimize Text/Picture" to get better quality text or a better quality picture.
- File Format
-
By choosing "Document File Type" you can have your scan saved in multiple formats.
The available file formats are listed below:
- PDF: This is the default file type. This file type provides the best overall image and text quality. PDF files require software that can open the file for viewing such as Adobe Acrobat Reader.
- JPEG: This file type is a good choice for most graphics. Most computers have built-in software that can view .JPEG files. This file type produces one file per page.
- TIFF: This is a standard file type that many graphics programs support such as Adobe Photoshop. This file type produces one file per image.
- MTIFF: MTIFF stands for multi-page TIFF. This file type saves multiple scanned pages in a single file.
- XPS: XPS (XML Paper Specification) creates an XAML file that preserves the original formatting of the document and supports color graphics and embedded fonts.
- PDF/A: PDF/A is a type of PDF designed for long-term archival of electronic documents. All format information in the documents is self-contained.
